Thursday, December 9, 2010

Holiday Vignette

If you've been around here for a bit you surely know that "traditional" is not our style... I definitely tend more towards pretty and quirky to offset all of our antique furniture. The non-traditional extends to holiday decor, as well. I cannot stomach red and green in my home, even for Christmas. I prefer metallics, pastels, and icy tones. I'm also not a fan of "crafty" holiday stuff. "Artsy", yes. "Crafty", no. But all of this means it is difficult to find holiday decor that I like and will actually re-use year after year.

As of now I have one single large Christmas tub and it is mainly full of ornaments. I don't have any real holiday specific decor. No cute snowmen, no sparkly reindeer, no angels. So how do I make things look festive? Hmmm... In the interest of working with what I've got and not spending lots of money on useless crap I'll have to store 10 months out of the year, I threw some ornaments and bows around and called it a day.

On top of our china cabinet.

Bows from Ikea. 

Fall/Winter china with a few bows.

My grandmother buys all the grandkids an ornament for Christmas. Mine has been Barbie for years now.


More ornaments and bows from Ikea. Plus, a candle I bought at Target last year. 


How do you decorate for the Holidays? Do you prefer to stick with  the palette already in your home or do you go all out with greenery and big red bows?

Dining Room Window Treatment

Sorry I have been slightly MIA lately, especially on the finished project front, but I haven't been feeling especially chatty. We've gotten a lot done around the house and I've taken pictures, but then I look at the pics and I convince myself that they aren't good enough (the pics, not the projects). So you are going to get slightly craptastic photos that don't really do justice to my new fabuloso drapes!

We last left off here:


Then I showed you guys my china cabinet redo and you could see the beginnings of something here:


Here's a better shot of the rod on the floor:


Mr. made this curtain rod out of 1/2 inch aluminum conduit, which cost us about $9.00. Then he made four brackets out of 1/2 inch aluminum flat stock:

And here's the after:


Excellent. 

Details? 

Anchored 'em in.


Double pinch pleat. 


Easy schemesey.

Double pinch your drapes at either end. Measure in between. Divide by how many clips you've got. Pinch. Pinch. Pinch. Ta-Da!


It's hard to tell the color. They are from J.C. Penney; Chris Madden Mystique Interlined blah, blah, blah... in Antique Blue. 

My S-I-L came by my house to pick up our old (2 yrs.) Christmas tree (I just wasn't feeling the green anymore) and asked where I got my drapes... "J C Penney", I said. "Do you know what they're called?" she said. "Chris Madden is the designer", I said. "Are they Mystique?", she asked.

Why, yes, they are in fact. Oh, well, turns out she's had her her eye on these in Gold for months (maybe years) now, for their dining room. I'll be sure to share pics of her new drapes when we head over there for Christmas.

Here's a close-up of the fabric:


And here are the finials:


Which are totally 40% off Hob Lob knobs - hot glued on.


BEFORE

AFTER

What do you think?

Tuesday, December 7, 2010

Monkey Love

When we moved into our house, out fireplace was labeled "non-functioning". Turned out all it needed was a chimney cap (the hole was covered with a lead sheet) and to be re-tuckpointed. Well, as anyone with a brick home knows, tuckpointing can be crazy expensive. Lucky for me, the Mr. can do anything. 

{Insert imaginary cute picture of a hot guy holding a trowel and smiling}

He located a cap to fit our chimney top and he tuckpointed the firebox. Ta-Da!


We now have  working fireplace and Gidget is loving it!


Sunday, December 5, 2010

Dare to DIY Blog Party: Week #4

Dare to DIY

It's Week #4 for the Dare to DIY Blog Party over at the Newly Woodwards and this weeks theme is: Dare to... Give Homemade Gifts!

Now, I'm cheating a little week. I didn't get any Christmas presents made this weekend due to my work holiday party on Friday night and the Mister's aunt's wedding yesterday. However, I did get started on making our Christmas stockings. The Christmas stockings we had were just not working for me anymore, plus we only had three and we're four this year. We were four last year, too, but I didn't bother decorating because I was working on the living room at the time. Anyway, the stockings we had were red and green and traditional and red does not work in this house, not even for Christmas. So, I decided to make some with, what else, the same curtain material I used for the dining room tie-ups, the chair, the master bedroom drapes, and the living room drapes.


I still have to add trim to this one and sew up the other three, but I'm pretty excited about how well the first one turned out! I got the leopard fabric at Hobby Lobby with a 40% off coupon and I got some pretty trim to coordinate:


Hopefully I can whip through the other three tomorrow evening.


And, after seeing the Three Sisterz Rosette Stockings, via Kim's party, I may just have to add a little flower or two to the project!

I want to make a coordinating tree skirt too, but I can't decide if I want to make it leopard with white trim or vice-versa. Our Christmas tree is white with silver and white ornaments.

What do you think? What would you do?

Tuesday, November 30, 2010

Dare to DIY Blog Party: Week #3

Dare to DIY


It's Week #3 for the Dare to DIY Blog Party over at the Newly Woodwards and this weeks theme is: Dare to... Eat Cookies!

I'm a few days late, but better late than never, right?? Right.

Mister loves him some Red Velvet Cake and he had a sucky day yesterday, so I thought I'd treat him with Paula Dean's Red Velvet Sandwich Cookies! Mine definitely don't look like the picture and I would make them smaller next time, but they turned out pretty great otherwise. Mister is sitting next to me snarfing them down, so I guess they are good enough for him!


Come join the fun over at Kim's and check out all the other links!

Tuesday, November 23, 2010

The Indian Burial Ground

A while back a gentleman stopped at our house and told us he had grown up here! His name is Eugene and his sister, Eleanor, had lived in the house until about a year before we bought it (it was empty until we purchased it). He said he and his father had built the house themselves. They hired a stonemason to lay the exterior stonework and the fireplace. They did all the carpentry and the finish work themselves. He told us that during the Great Depression his father was out of work, so they moved to Springfield, Missouri for a few years and the house stood vacant.

The little barn we have off to the side used to be a chicken coup:


 See that little blue bed frame behind the turned wood piece? I told the Mister we were going to have to salvage it if we ever had a kid. It's so precious!


Even the chicken coup was solidly built! These boys loved their concrete (hey Kim, read your comment to this post, it totally applies this week, no?) and stone.

During the course of the five hours (!) Gene was at our house, he told the Mister there was an Indian buried on our property and waved in the general direction of the hill below the chicken coupe. Well, of course, Mr. took it with a grain of salt and a smile, but when the old man left, he went looking.

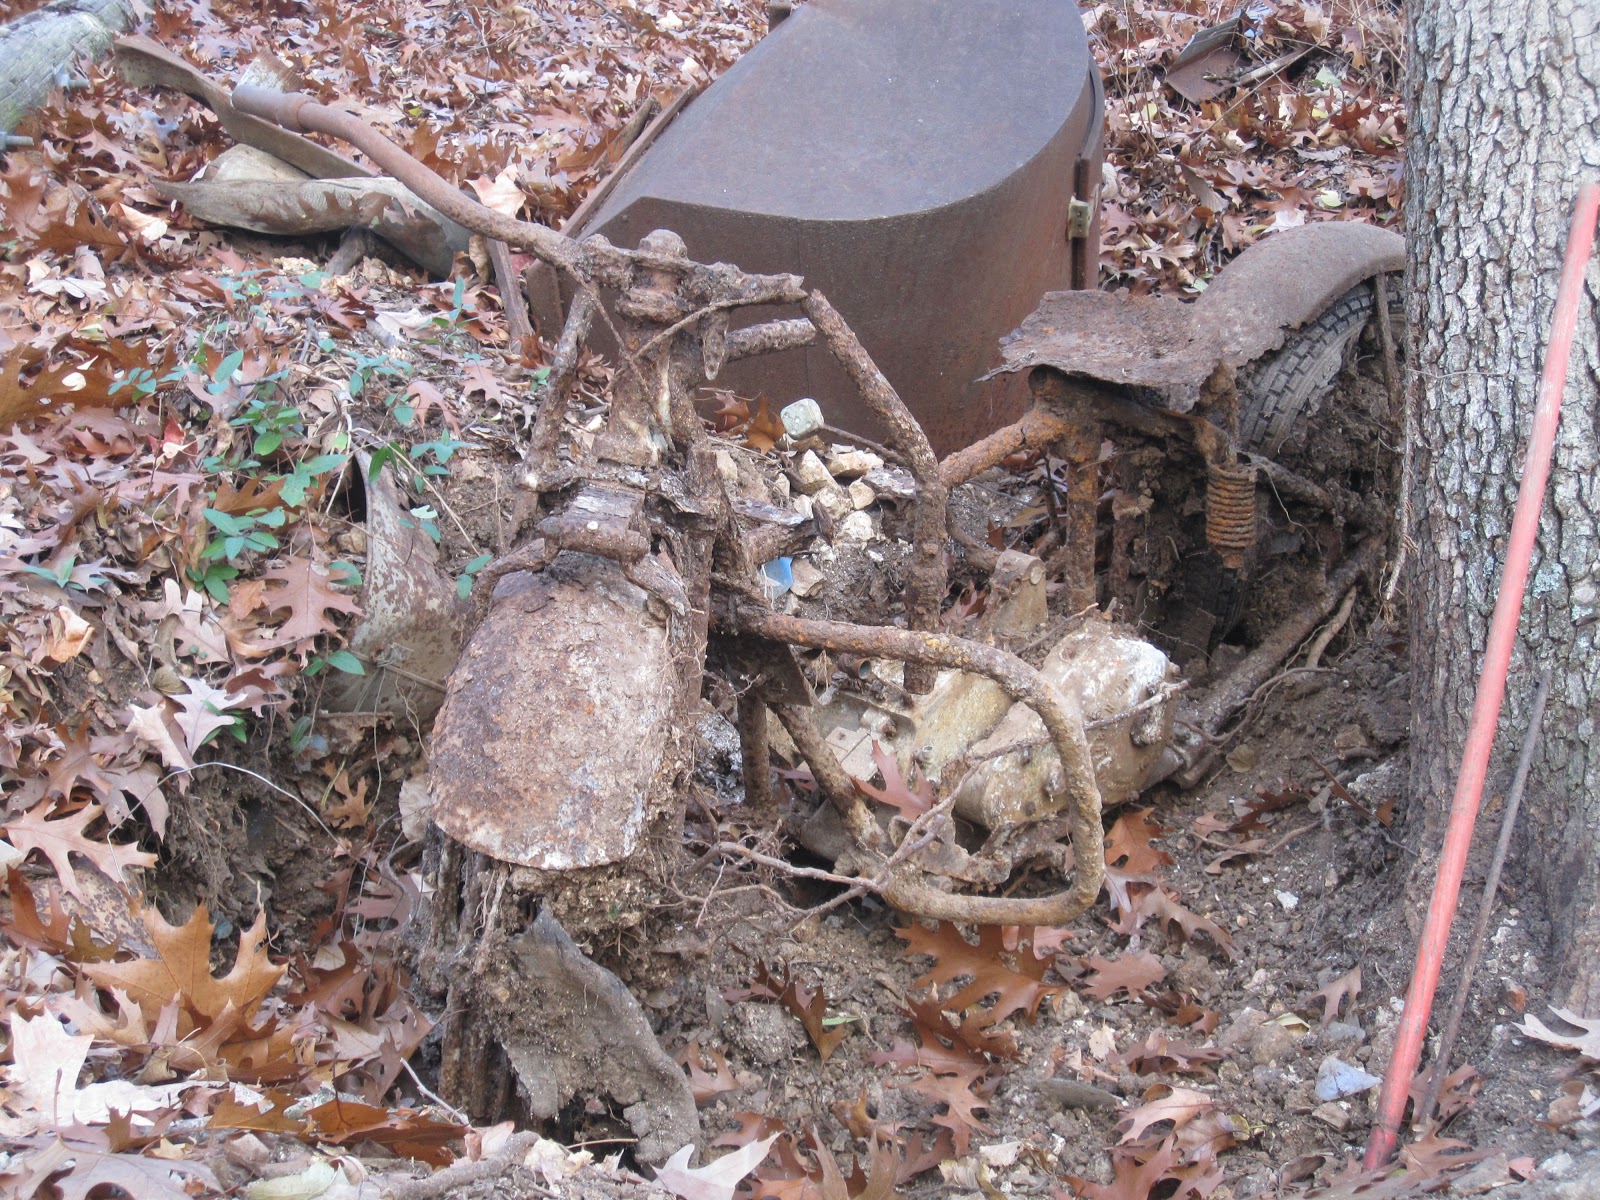
Sure enough, he found an old Indian buried on our hill! 


Ha! You totally thought he found a dead body, didn't you?! hehehehe

Once he knew it was there he couldn't just let it be, he had to excavate it.


He finally finished digging it up on Saturday and managed to stand it upright.


The shifter knob was a die and it's still intact. Super cool.

I believe this is the fly wheel housing. Mister has a friend who runs an antique motorcycle shop and says, based on Mr's description, he thinks it's a 1928, 29, or 30. How crazy is that?

For those of you that live in old homes, have you ever found anything ridiculously awesome? Maybe in the basement, the attic, or even outside?