We bought two lengths of simple base moulding at Lowe's, measured the pieces to fit the television dimensions, cut the pieces to(approximately) a 45 degree angle, and glued them together. I am sure there is a simple, quick way to do all this, but this was definitely not simple or quick. When Mister does not have the equipment to accomplish a particular task he makes it. So he hand sanded the pieces when they did not fit perfectly and he created a form to keep the glued corner tight as it was drying. Then, after it was all together, he hammered in these things:
And I filled the egdes/corners with paintable wood filler:
Here is the unfinished product in place:
I decided I wanted it silver and so far all the silver spray paint I have tried looks like spray paint. Not pretty.
I decided to silver leaf it! Of course, I got the idea from Jenny at Little Green Notebook with her fabulous client silver leaf dressers...
First, I spray painted it ORB (because it was the only dark color I had on hand), so the light colored wood wouldn't show through. Plus, the packaging says you are supposed to prepare the surface with this fancy-schmancy red paint to make the leaf POP!, but no one had it. So I used what I had.
At Michaels silver leaf sheets are available two ways: on wax paper and not on wax paper. The "on wax paper" option is supposed to be cleaner, easier, and it's supposed to make the leaf go farther since it's not flying around the room like a freakin' snow globe. But, it's the same price for less sheets. So I went with the messier, cheaper option, of course!
At first I attempted to lay the sheets evenly:
But that didn't last long. I couldn't get it in the crevices, then when I got a tool small enough, it refused to stick in the crevices...
So, I just started ploppoing it down willy-nilly...
I prefer the antique-ey, not-so-perfect look anyway... ;D
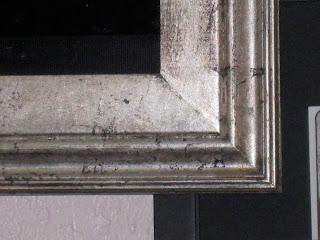
The "finished" product was too shiny and perfect for me so I threw a coat of gel stain on it, then wiped it down. Ta, Da! Our six-months-in-the-making-centerpiece-for-the-gallery-wall:
 |
| Love me some Gilmore Girls! |
I also finally got all the pieces matted that I have for the wall (so far). Now I just have to decide on placement. Should only take about another six months or so!
I'm linking up at Debbidoos Before and After party, come join me!
Also linking up to Show & Tell at Blue Cricket Design!


