Showing posts with label Master Bedroom. Show all posts

Friday, January 21, 2011

Master Bedroom Progress: Art!

This is what our MB looked like for over a year... Well, it wasn't gray for a year, but this is what it's looked since I painted it in June. It basically looked the same before that, only with lilac walls, courtesy of the previous owner.

I found a bedside dresser for the Mister in July, made drapes in August, found lamps in October, and finally got around to hanging the art that's been sitting on our dresser for 4 months last weekend. And here it is now.

Since our walls are not normal plaster, but some kind of mortar/concrete mix, I hate to drill holes wily-nily.  And I can't just tap in a nail and move it if it's not right. Hanging things in our house involves a big process, lots of measuring, and a concrete drill bit in our DeWalt Hammer Drill. So I decided to try out the kraft paper pattern concept, which worked pleasingly well. I cut out two pieces of kraft paper the same size as my framed pieces. I eyeballed it a little on where I wanted them hung, then decided on an exact height from the ceiling to work with so they'd both be identical. I taped them up, marked the center where the hole needed to be and stepped back.

I decided they were too far apart, so instead of taking them down and rehanging them, I just moved the spot for my hole a little in on each one. I marked the correct mark with an arrow, so as not to confuse myself, and then I drilled straight through the paper and into the wall.

I pulled off the paper, malleted in my anchors, drilled in my screws, and TA DA!


We have art. Excellent. It's finally started to look "decorated". I still have a triptych I need to frame for the wall to the right and I need to figure out what to do with the walls next to the window, but it's definite progress.


Interesting story behind these pieces, too. I found this one, The Dreamer, years ago at an art fair. The artist, Randal Spangler, told me it was an old print that he didn't produce anymore and it was the last of it's kind. His style had changed to a more colorful Fantasy style and he was no longer doing the pen ad ink drawings. It was matted in navy and I never found the perfect place for him. 

Fast forward 6(?) years. My mother and I were at the same art fair looking through Mr. Spangler's pieces. I don't even really know why, since his newer stuff doesn't really speak to me in the same way. But low and behold, we find a mate for the Dreamer, titled Dreams. Dreams features a couple instead of a single man and I just love the huge window detail above the bed.

I have a small tattoo on my left wrist of a heart with wings that a friend of mine drew for me a decade ago, so the headboard detail in the drawing is especially fitting.

I re-matted both in black 16 x 20 mats and stuck them in Hobby Lobby MDF frames. I got the mat, the mat cutter, and the frames all on sale, 50% off. Can't beat that.

Wednesday, January 19, 2011

Master Bedroom Progress: A Bedside Dresser!

In our old house there was only enough room for one bedside table and it was (still is) very small. It lived on my side of the bed (still does) and Mr. just stacked his books, glasses, gun, etc. on a small stool on his side. When we moved into this house I knew we would need a more permanent solution for all his goodies and I started looking for an antique dresser for him. I knew a normal nighstand wasn't going to cut it, since our bed sits up really high and our existing nightstand is tall. It took me a year to find the perfect piece and in the meantime his nightstand was composed of two black Ikea Kassett boxes stacked atop each other.

Good lord, look at that mess! Isn't it amazing how once a space starts to come together and you feel good about your surroundings then you start to clean up after yourself more? I will never win Housewife of the Year, but at least our house doesn't (normally) look like a tornado hit it anymore.

In July I found this gem when we happened to be in Kentucky for my cousin's college graduation:

It was $80. Maybe this seems like a lot, but this is the style we are always on the hunt for and it tends to be pricey in the Midwest. Plus I didn't want to paint it, so I needed something in fairly decent shape. When we got home and had the Mister unload it he got upset because he thought we had paid hundreds of dollars for it.

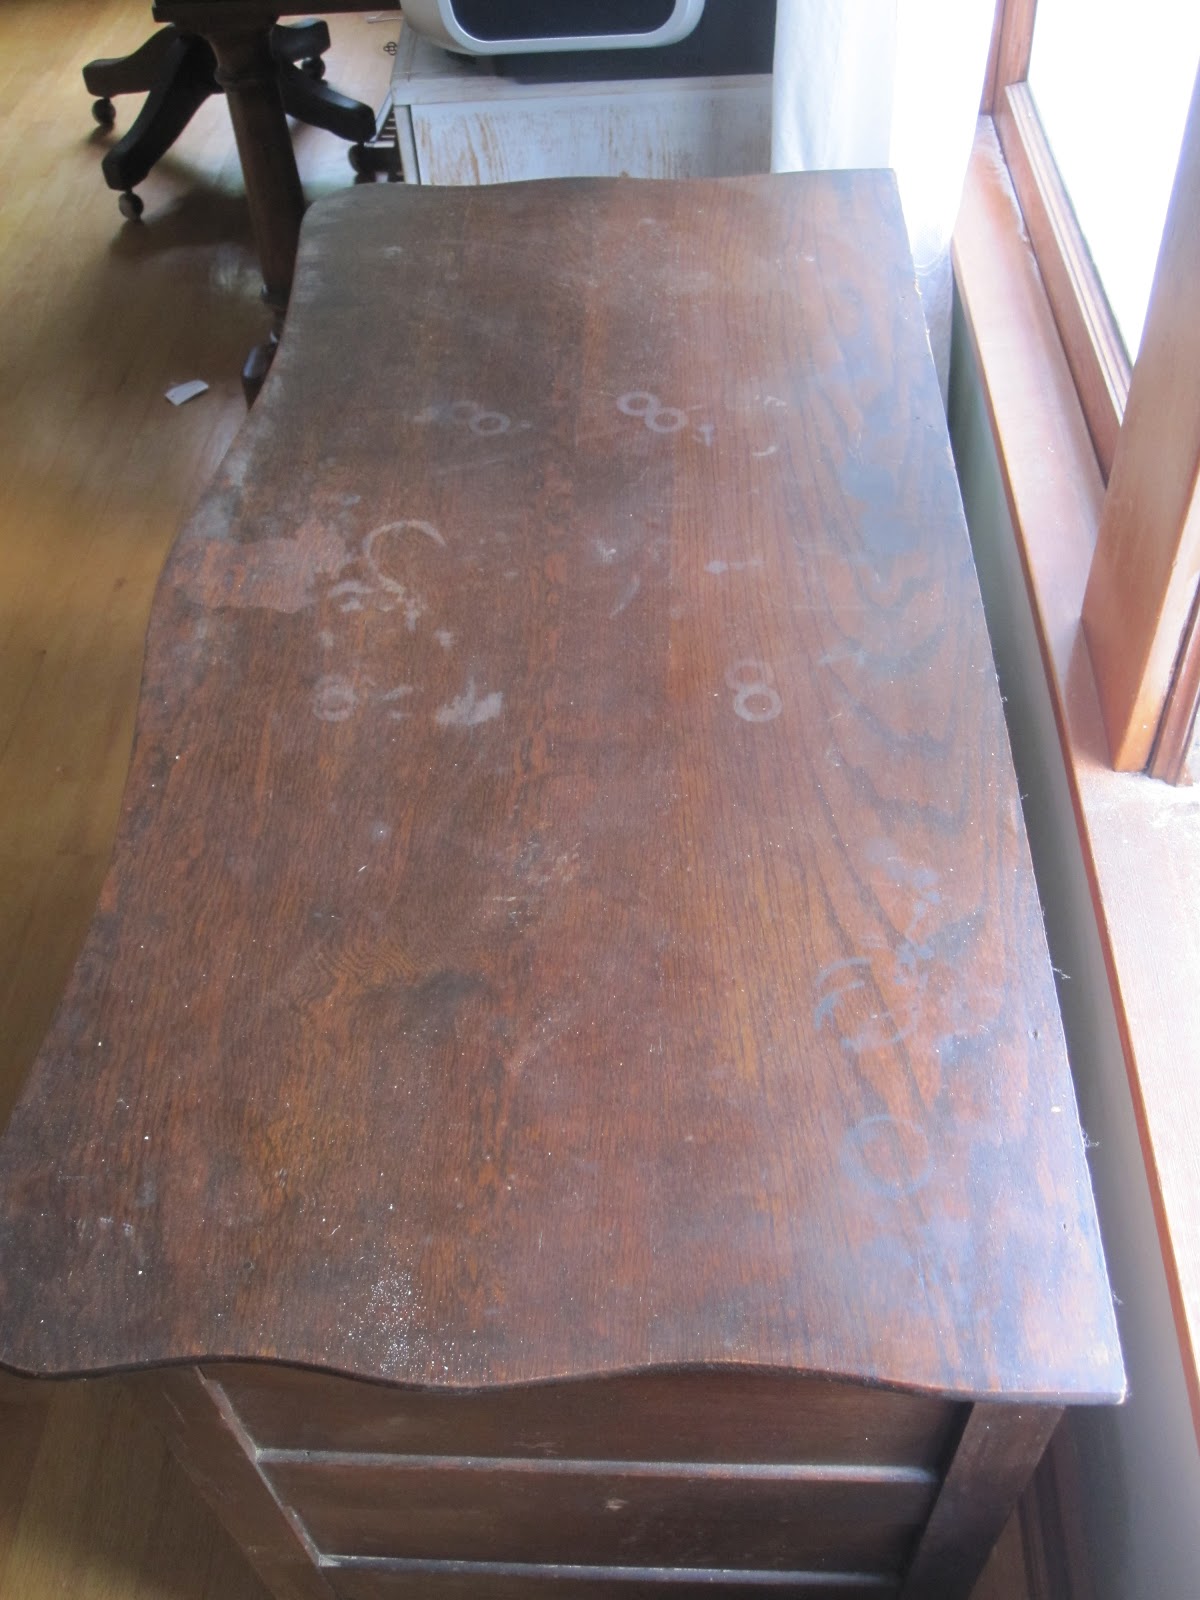
The top needed some sanding and refinishing:


We sanded it down, plopped on two coats of Minwax Water-Based Stain in Coffee:

I actually took one of the drawers with me into Home Depot and it was a lifesaver! Both of the colors I initially thought would work were WAY off and this stuffs non-refundable, as they blatantly point out on the label.

The directions tell you not to sand between coats and to only do two coats of stain. This is what happens when your overzealous domestic partner butts in on your project and throws caution (and the instructions) to the wind:

Ugh. It looked like someone painted it with melted chocolate... I had to wait two days for the whole thing to dry completely and thoroughly and then buff it out. Ridiculous.

Here's the final product. Lovely. You can still see the grain, but the stains are completely gone, and it matches the original finish perfectly.


It's by no means perfect, but I wasn't about to sand down the entire thing and re-stain it. I'm lazy.

I hated the original, boring wooden knobs, so I replaced them with these fun drop pulls.

I was also not a fan of their shiny brass finish and I did not want to pay nearly double for the "antique-by-hand" finish, so I ordered up some Brass & Bronze Aging Solution and did it my ownself.


Get your supplies together, drop your hardware in the solution.

And watch that baby tarnish.

Awesome.

I'm linking up at The Shabby Chic Cottage!

Thursday, October 28, 2010

Master Bedroom Progress: Lamps!

I showed you guys these shots awhile back for Centsational Girl's "Where Do You Blog?" post.


In our old house we only had enough room for one side table in the bedroom and this was it. It was actually pink when I stole rescued it from my father's basement. Now I kinda wish we'd kept it pink... *sniffle*

So we had mismatched bedside lamps for over a year in this house because the Mr. didn't have a bedside table. I couldn't decide on anything. Plus, our bed is high and nothing was tall enough.

PLUS, I couldn't make a decision on lamps. I would find some that I kinda liked, not buy them, then decide that I had to have them, then they would be gone.

I found a pair of silver lamps at Sears that I loved, but one was missing the harp and the other had a funny golden hue to it.

Then I found an adorable teal pair at Home Goods, hesitated, and missed 'em.

Then a lovely cream double-gourd pair with a fun vertical ripple pattern at TJ Maxx's. They were gorgeous. I waffled for like a month, they had them the whole time... I finally went back for them and they only had one! I had them call every store in the city and no one had them... Sad, sad day...

I recently walked into Home Goods looking for something else (I have no idea what now) and the most wonderfully fabulous lamps ever practically jumped off the shelf at me!


They are high enough to read, they came with a huge, fun shade, and they look nearly identical to the first pair I wanted from Sears! Yay!

Mr. has a bedside table now, too. Post to come.

Monday, August 30, 2010

Where Do You Blog? Par-tay!

I don't have a special place to blog. At the rate I'm going my office/crafty/sewing space is going to be the last space in our house to get organized and prettified. For now, I usually just hang out in our bedroom.


Which is still no where near finished. I matted and framed the prints for over the bed, but I am hesitant to hang them until I have both nightstands in place. In our house it's not as simple as popping a little nail in the wall and calling it done.
I found lamps at TJ Maxx that I love, but I hesitated and now they're gone. I also found a pair of brass lamps a few weeks ago in Ste. Genevieve for cheap that could be painted ala Sara and Jen and the whole blogging universe, but for some reason I didn't buy those either.... Ah, indecision...

I am joining in the Where Do You Blog? Party at Centsational Girl.

Tuesday, August 3, 2010

DIY:More Curtains for Super Cheap

I posted back in March about the tie-ups I made for the dining room windows out of LENDA drapes from Ikea. I also mentioned that I bought a butt-load of LENDA's thinking I would coordinate everything. We have high ceilings, it has been difficult to find curtains long enough to work, and I may have mentioned once or twice that I am out of cash. So in the interest of working with what I've got:

Master Bedroom Drapes Before

Master Bedroom Drapes After


And once again, I apologize for my horrific photography skills.

I got the idea to add ric-rac trim from this pic:

Suburban Spunk via Better After
I still need to add a layer of stiff fabric at the top to keep it from folding over, but I think it looks better than the plain curtains.


It was super simple too. The rolls of ric-rac from Hobby Lobby just happen to be 3 yards each which is perfect for my 100 inch curtains! I used 8 rolls of trim. I waited for it to go on sale, so each roll rang in between $1.50 and $2.00. Not too shabby.

I decided how far from the edge I wanted it, pinned it in place, then sewed over it all. Easy peasy.


It was fairly labor intensive, but super simple. If I was a "finish-a-project-when-you-start-it" kind of girl, I bet it wouldn't take more than four hours, max. Apparently Suzanne (at Suburban Spunk) used no-sew hem tape to keep hers on, so if you don't have a sewing machine, no problem!

I'm linking up to The CSI Project's Fabric & Sewing Challenge and Thrifty Chick Decor's Before & After Party. Join me or just come check out all the superfantastic projects!


Tuesday, June 22, 2010

Master Bedroom Progress

I have decided there will never be anything to call a finished "Before & After" here at the Little Pink House, only "Before & During". Remember how I talked about my inability to follow-thru with anything? Well, it doesn't seem to be improving.
I can't find any beside tables that I like or can commit to, I haven't found lamp bases, and I haven't hung the art I have for the room. I did find lamp shades and throw pillows that I absolutely adore at Target a couple of weeks ago, though. I also purchase the Pottery Barn Woodland Organic Duvet Cover on Ebay recently, but I still have to get the shams. There is a reason I don't normally buy things on Ebay; there is no return policy (usually). I should have looked at the bedding in person before I ordered it, there is a lot more brown in it than I realized. Oh, well. Shockingly, Mister actually likes the Duvet Cover. I really thought he was going to hate it!
Anyway, here is a glimpse at where our Master Bedroom is currently.


Things that still need to be done:

*Add trim to the curtains.
*Make or buy Roman Shades for the "radiator season".
*Make a black and white cover for the dog bed.
*Organize the bookshelves.
*Find nightstands.
*Find lamp bases.
*Hang art.
*Decorate the top of the bookshelves.
*Buy Woodland shams to match duvet cover.

Wednesday, June 2, 2010

Weekend Excitement

This weekend I didn't leave the house for two days! I finally finished painting our bedroom! Yay! I really don't understand how everyone else knocks out these massive projects in a day or two. Wheew... I still haven't found bedside tables or lamps, but the painting is DONE! Here's a sneak peek of the yummy color:


The drapes were originally hanging on those cheap, yucky metal bars that always seem to be in older homes... Now they are too short.

I should probably vacuum up the drill dust, eh?
 
Luckily I never hemmed them! They are just pinned, since I knew I was going to change out the rods eventually.

On Monday we went to the Gypsy Caravan. They call it an "antique, craft, and flea market", but really it was like a big garage sale. There was some good stuff, but most of the "good stuff" was priced out of my range. Just a taste of what we saw:


It was insanely, crazy busy and I am not a big fan of crowds. Plus, it was about a zillion degrees! My sunscreen crapped out, but only half of it, so I am red and splotchy on the back of my neck and the  left side of my chest... I made a big stink about how I won't go next year, but we all know that's not gonna happen! LOL I'll just have to be better prepared. Extra sunscreen, hat, breezy dress, comfy shoes, etc. My new fab jeans from the Gap were too tight (with the humidity) and I was miserable... Plus my lovely Cynthia Vincent flat gladiators from last year didn't have enough padding apparently and my feet still hurt!