Tuesday, November 30, 2010

Dare to DIY Blog Party: Week #3

Dare to DIY


It's Week #3 for the Dare to DIY Blog Party over at the Newly Woodwards and this weeks theme is: Dare to... Eat Cookies!

I'm a few days late, but better late than never, right?? Right.

Mister loves him some Red Velvet Cake and he had a sucky day yesterday, so I thought I'd treat him with Paula Dean's Red Velvet Sandwich Cookies! Mine definitely don't look like the picture and I would make them smaller next time, but they turned out pretty great otherwise. Mister is sitting next to me snarfing them down, so I guess they are good enough for him!


Come join the fun over at Kim's and check out all the other links!

Tuesday, November 23, 2010

The Indian Burial Ground

A while back a gentleman stopped at our house and told us he had grown up here! His name is Eugene and his sister, Eleanor, had lived in the house until about a year before we bought it (it was empty until we purchased it). He said he and his father had built the house themselves. They hired a stonemason to lay the exterior stonework and the fireplace. They did all the carpentry and the finish work themselves. He told us that during the Great Depression his father was out of work, so they moved to Springfield, Missouri for a few years and the house stood vacant.

The little barn we have off to the side used to be a chicken coup:


 See that little blue bed frame behind the turned wood piece? I told the Mister we were going to have to salvage it if we ever had a kid. It's so precious!


Even the chicken coup was solidly built! These boys loved their concrete (hey Kim, read your comment to this post, it totally applies this week, no?) and stone.

During the course of the five hours (!) Gene was at our house, he told the Mister there was an Indian buried on our property and waved in the general direction of the hill below the chicken coupe. Well, of course, Mr. took it with a grain of salt and a smile, but when the old man left, he went looking.

Sure enough, he found an old Indian buried on our hill! 


Ha! You totally thought he found a dead body, didn't you?! hehehehe

Once he knew it was there he couldn't just let it be, he had to excavate it.


He finally finished digging it up on Saturday and managed to stand it upright.


The shifter knob was a die and it's still intact. Super cool.

I believe this is the fly wheel housing. Mister has a friend who runs an antique motorcycle shop and says, based on Mr's description, he thinks it's a 1928, 29, or 30. How crazy is that?

For those of you that live in old homes, have you ever found anything ridiculously awesome? Maybe in the basement, the attic, or even outside?

Sunday, November 21, 2010

Dare to DIY Blog Party: Week #2

Dare to DIY

It's Week #2 for the Dare to DIY Blog Party over at the Newly Woodwards and this weeks theme is: Dare to... Entertain!

We don't entertain. Like ever. Our Halloween party was the first time we had ever invited people into our home for any reason other than moving or bringing something by.  So it may come as no surprise that I have never set a table, not even when I was a kid. In our family the food is the main event, no one cares about how pretty the table setting is... My grandfather always made sure to take lots of pictures of the food, the desserts, the wine, people eating. As long as you were eating, nothing else mattered.

So here is my virgin attempt at setting a table. Try not to point and laugh.


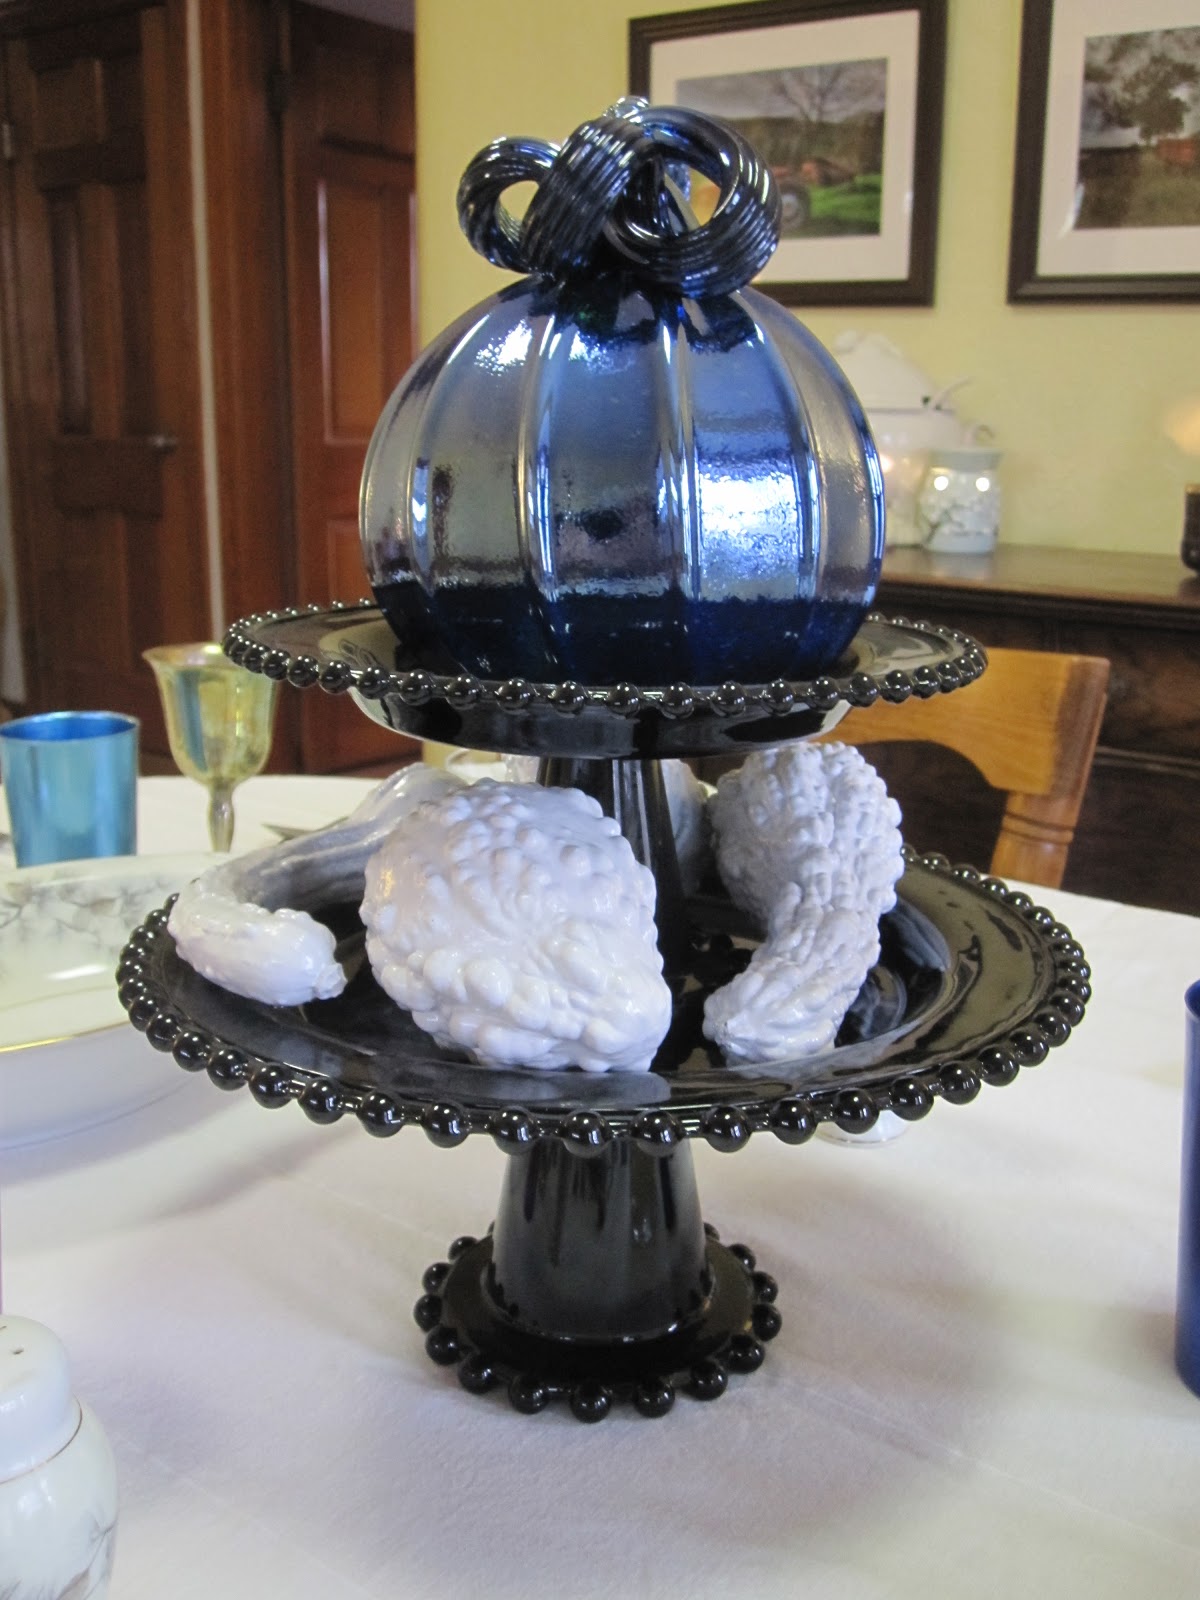
You can tell that blue thing is a pumpkin, right? 
The Mister was all "I've never seen a pumpkin with a stem like that!". Yeah, well, have you ever seen an iridescent blue pumpkin? He's like "Normal people may not realize it's a pumpkin". Well then it's a good thing we're all abnormal, right? Besides it's art! I got it at Third Degree Glass Factory on Friday. AND it matches my new drapes!!! Which will get their very own post sometime this week.

These are live gourds I spray painted white. The paint does not like to stick to the smooth surface of these.

My paternal grandmothers cut glass pitcher, it's mesmerizingly beautiful IRL. We are moving her to a smaller place on Tuesday and her china hutch won't fit. Which is also why I have her china now.

I used the china with pine cones on it Mr's mom gave me, with cut glass bowls she found for me at a town rummage sale, and our everyday utensils because we don't have fancy silver. Yet. That is going to be my next antique mall purchase. I see sets all the time for reasonable prices and for some reason haven't bought one yet. 

The silver goblets were from the same rummage sale as the glass bowls and the aluminum cups were my maternal great-grandmothers.


Since we never entertain and we're not fancy, I don't own a tablecloth. So I used a curtain!

Of course, if we were actually having live humans over (instead of cyber ones! lol) I would take the time to trim the tabs off, make a runner out of it (which I've been meaning to do for months!), or buy a real tablecloth.

Not bad for a first attempt, if I do say so myself. It's no Eddie Ross set-up, but it'll do.


Come join the fun over at Kim's and check out all the other links!

Thursday, November 18, 2010

Recipe: Roasted Brussel Sprouts

I found this recipe in The F-Factor Diet cookbook. I have adjusted it slightly to fit our tastes (there is no red pepper in the original). I know many of you probably think Brussel sprouts are disgusting and smell like cabbage. Well, just like green beans and asparagus, there is definitely the potential to overcook them. Don't. Follow these directions and they will turn out beautifully green and fresh tasting, almost sweet. Just try them once.

1 10-ounce pkg. frozen no-salt-added Brussel Sprouts (I used fresh)
2 cups chicken broth (I used no-salt chicken bullion)
1 tbsp. olive oil
1 tbps. chopped garlic
1/2 tsp. salt (I omit the salt)
1/4 tsp. pepper (I use 1 tsp.)
1 tsp. red pepper 
2 tbsp. sliced almonds, toasted

1. Preheat oven to broil. 

2. Place chicken broth in a pot and bring to a boil.


3. Add Brussel sprouts and cook for 5 minutes, until tender.


4. In the meantime, chop your garlic and add it to the olive oil, pepper, red pepper, and salt (if using) in a bowl large enough to hold your Brussel sprouts.


5. Drain Brussel Sprouts.


6. Cut them in half.


7. Place in bowl with ingredients and toss to coat.


8. Spread Brussel sprouts onto a baking sheet and broil for 8 minutes, stirring after 4 minutes to ensure even cooking.


9. While sprouts are roasting, toast your sliced almonds. Toss occasionally to avoid burning.


10. Serve sprouts topped with toasted almonds and prepare to be shocked by how fantastic they are!


11. Yum!

Monday, November 15, 2010

From "Blah" to "Ta-Da!": Aunt Gladys' Chair Makeover

This chair has been sitting in the Mister's parents basement for years (and years).


Apparently she belonged to the Mister's Aunt Gladys (who I think was his dad's sister). He remembers her sitting and looking out the window for hours, from this chair. But unfortunately, she (the chair, not Aunt Gladys) was a full-on Monet (quick! Which movie?). It was lovely from a distance, but up close it was faded and chippy.


Which is really a shame, because the crewelwork pattern and colors were lovely. The frame appears to be finished wood, but it's actually painted brown and I detest anything brown that is not: wood, leather, or an animal. Ick.

Actually, it's lucky the seat needed to be re-covered, because when I took off the fabric I found this:


It was four layers worth of snapped, brittle 1/16 in. plywood.

So I cut a new seat base from 1/2 in. plywood we had on hand using the Mister's jigsaw:


And I painted the chair with Rustoleum's Semi-Gloss Black:

I ran out of spray paint and didn't want to make a 30 mile trip to Home Depot. 


I couldn't get anything small enough through the holes in the frame to mark the new seat for screws, so I taped the seat in place and stuck a really long drill bit in the holes:


I cut a new piece of 2 in. foam that I had left over from the last chair:


I sprayed both the foam and the seat base with Krylon Easy-Tack (just to make it easier to work with, so it wasn't sliding around) and wrapped the whole thing in a layer of batting (that I also had from the first chair and then two layers (because you could see through the first) of my fabric of choice, the Lenda Bleached curtains from Ikea:


I love the pinstriped detail, the color, and the price! It's a lovely neutral without being too beige or too white or too cream. It's not permanent, just until I can pick a fabric or at least figure out where this chair is going to live.

So here's the before again:
BEFORE
and the
AFTER
With my lovely Halloween pillows from LilyBethGoodies on etsy


I just love the detail on this chair:


What have you made over lately?

I'm linking up to Metamorphosis Monday at Between Naps on the Porch.